
티스토리 뷰
<p>
  <button class="start-btn" (click)="exectueButton('start')">시작</button>
  <button class="stop-btn" (click)="exectueButton('stop')">멈춤</button>
  <button calss="reset-btn" (click)="exectueButton('reset')">리셋</button>
</p>


import { Component, OnInit, Output, EventEmitter } from '@angular/core';

@Component({
  selector: 'app-buttons',
  templateUrl: './buttons.component.html',
  styleUrls: ['./buttons.component.css'],
})
export class ButtonsComponent implements OnInit {
  @Output() clickEvent = new EventEmitter();

  constructor() {}

  exectueButton(command: string) {
    this.clickEvent.emit(command);
  }

  ngOnInit(): void {}
}
버튼클래스를 활용하기위해 동적으로 바꿔준다. executeButton 라는 이름으로 바꾼후 command를 받는다.
무엇을 누르게되던. 결국 부모컴포넌트의 clickEvent가 발생하게되고
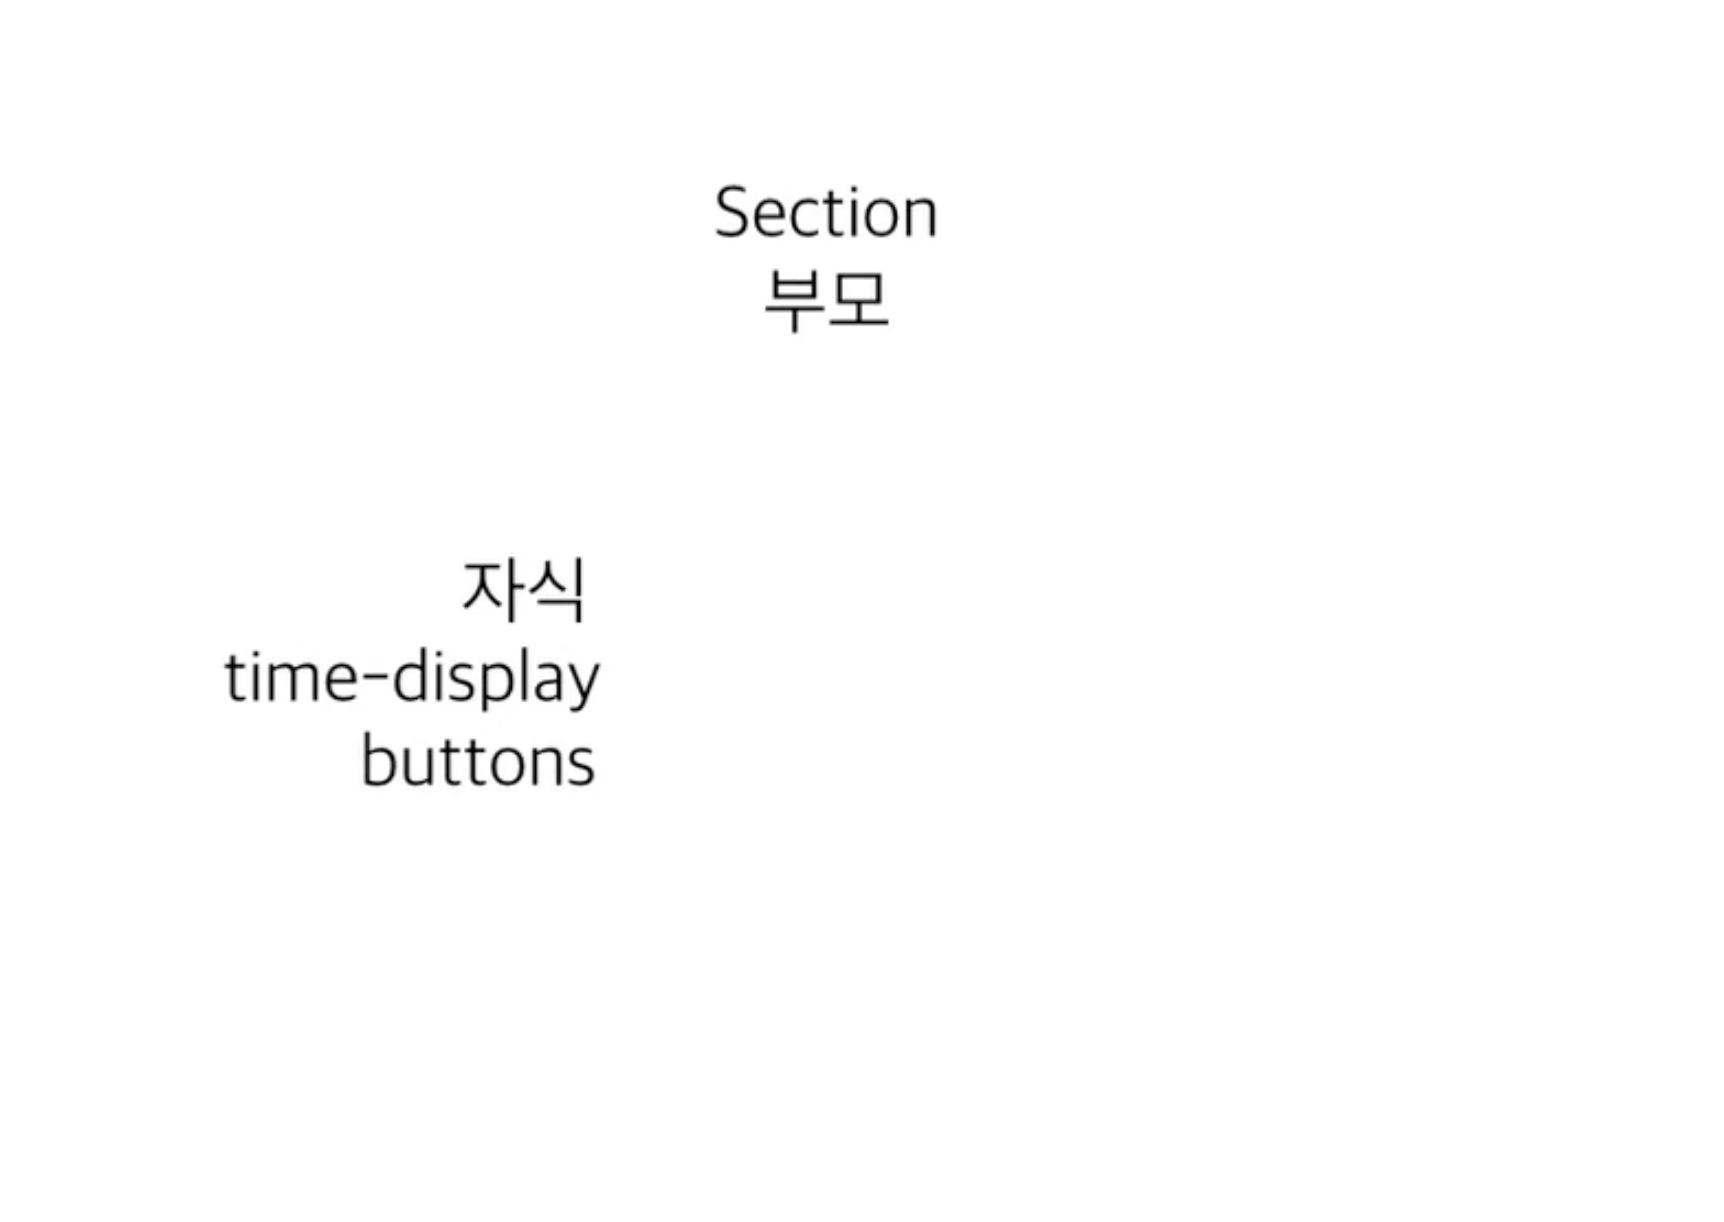
<div class="title">
  <div class="display">
    <app-time-display [inputData]="present"></app-time-display>
    <app-buttons (clickEvent)="startTime($event)"></app-buttons>
  </div>
</div>

import { Component, OnInit } from '@angular/core';

@Component({
  selector: 'app-section',
  templateUrl: './section.component.html',
  styleUrls: ['./section.component.css'],
})
export class SectionComponent implements OnInit {
  present = 'welcome';

  constructor() {}

  startTime($event: any) {
    this.present = $event;
  }

  ngOnInit(): void {}
}
startTime을 했을때 자식으로 딸려온 이벤트 command가 들어가게되고 그것이 this.parent값이된당
start를 누르면 welcome => start로 바뀌게되는 원리
<div>
  <div class="time-text">
    <span> {{ min }} : {{ sec }}</span>
    <small> . {{ ms }} </small>
  </div>
</div>


import { Component, Input, OnInit, SimpleChanges } from '@angular/core';

@Component({
  selector: 'app-time-display',
  templateUrl: './time-display.component.html',
  styleUrls: ['./time-display.component.css'],
})
export class TimeDisplayComponent implements OnInit {
  @Input() inputData: string | undefined;

  min: number = 0;
  sec: number = 0;
  ms: number = 0;
  timeInterval: any;

  constructor() {
    // setInterval(() => {
    //   this.test++;
    // }, 1000);
  }

  timeStart() {
    this.timeInterval = setInterval(() => {
      this.ms++;
    }, 10);
    clearInterval();
  }

  timeStop() {
    clearInterval(this.timeInterval);
  }

  timeReset() {
    this.timeStop();
    this.ms = 0;
  }

  ngOnChanges(changes: SimpleChanges) {
    for (let propName in changes) {
      if (propName === 'inputData') {
        switch (changes[propName].currentValue) {
          case 'start':
            this.timeStart();
            break;
          case 'stop':
            this.timeStop();
            break;
          case 'reset':
            this.timeReset();
            break;
        }
      }
    }
  }

  ngOnInit(): void {}
}
사실상 재사용성이없어서 아래와같은 구조로 만들어도 무관했다.
재사용할수있는가에 중점을 맞춰서 설계해야한다.
그렇다면 위와같은 형태로 다시 리팩토링을 해보자.
주석처리하고 한군데다가 때려넣으면 된다...
<div>
  <div class="time-text">
    <span> {{ min }} : {{ sec }}</span>
    <small> . {{ ms }} </small>
  </div>
</div>

<button class="start-btn" (click)="timeStart()">시작</button>
<button class="stop-btn" (click)="timeStop()">멈춤</button>
<button calss="reset-btn" (click)="timeReset()">리셋</button>

import { Component, Input, OnInit, SimpleChanges } from '@angular/core';

@Component({
  selector: 'app-time-display',
  templateUrl: './time-display.component.html',
  styleUrls: ['./time-display.component.css'],
})
export class TimeDisplayComponent implements OnInit {
  @Input() inputData: string | undefined;

  min: number = 0;
  sec: number = 0;
  ms: number = 0;
  timeInterval: any;

  constructor() {
    // setInterval(() => {
    //   this.test++;
    // }, 1000);
  }

  timeStart() {
    this.timeInterval = setInterval(() => {
      this.ms++;
    }, 10);
    clearInterval();
  }

  timeStop() {
    clearInterval(this.timeInterval);
  }

  timeReset() {
    this.timeStop();
    this.ms = 0;
  }

  // ngOnChanges(changes: SimpleChanges) {
  //   for (let propName in changes) {
  //     if (propName === 'inputData') {
  //       switch (changes[propName].currentValue) {
  //         case 'start':
  //           this.timeStart();
  //           break;
  //         case 'stop':
  //           this.timeStop();
  //           break;
  //         case 'reset':
  //           this.timeReset();
  //           break;
  //       }
  //     }
  //   }
  // }

  ngOnInit(): void {}
}'Angular' 카테고리의 다른 글
| [Angular] 라우터모듈 (0) | 2022.05.31 |
|---|---|
| [Angular] 모듈의 이해 (0) | 2022.05.31 |
| [Angular] 데이터바인딩2 (0) | 2022.05.30 |
| [Angular] 컴포넌트배치, 데이터바인딩1 (0) | 2022.05.30 |
| [Angular] Angular Typescript (0) | 2022.05.30 |